DIY Snowman Sock!
An adorable and easy craft that will surely get you into the holiday spirit! With only six simple steps, you’ll be able to enjoy your very own Snowman Sock in no time! Customize yours with endless possibilities!
Watch the tutorial below for a visual step-by-step process or read more!

Supplies You’ll Need:
White Sock(s)
Colorful/Patterned Sock(s)
Whole Corn (about 2lbs for 2 Snowmen)
Fabric Markers (Black, Orange, Your choice)
Rubber Bands
Scissors
Glue (optional)
To add a little more pizazz, consider using buttons, pipe cleaners, or whatever else your heart desires!
Step One:
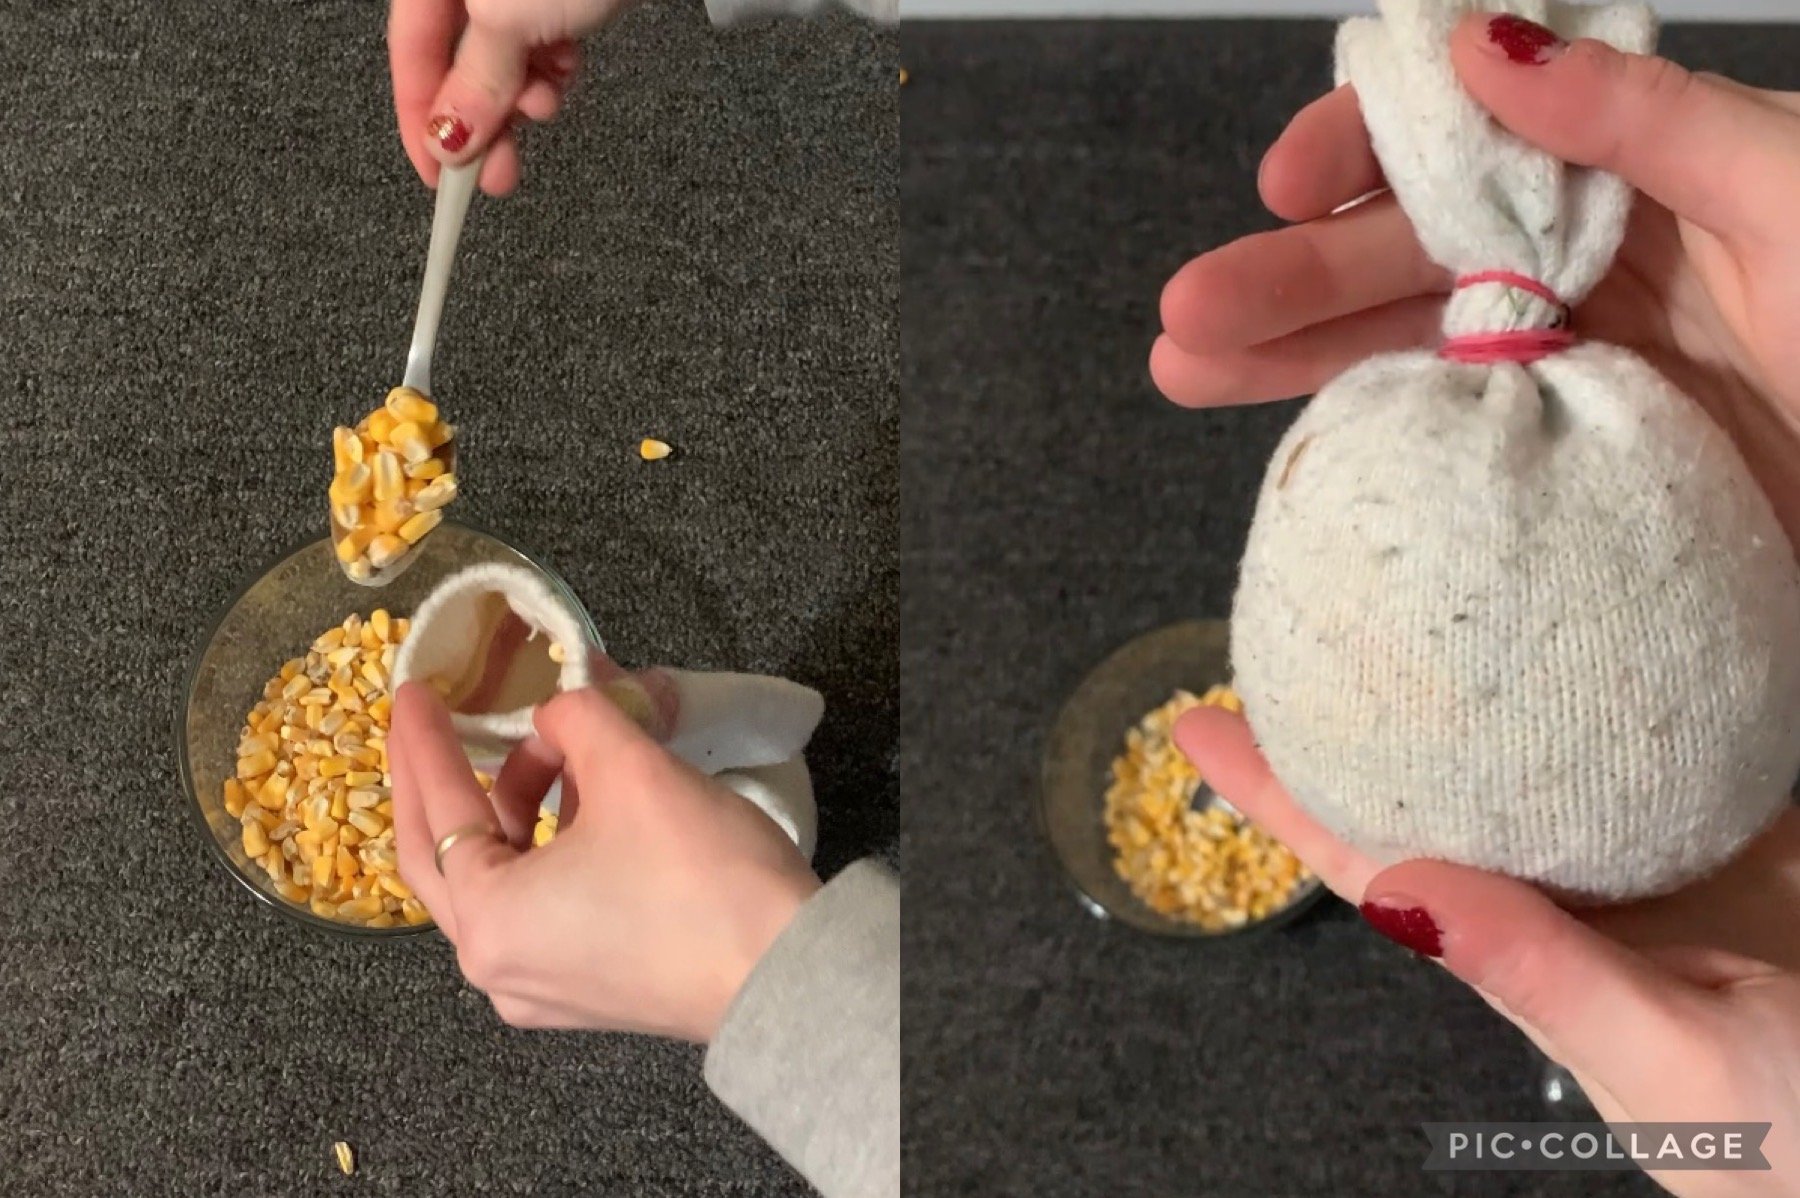
Start by filling your white sock with whole corn. Do so until a little over halfway full.
Once desired amount of first section is filled, tie off with rubber band.
Tip: We used about 1lb of corn for an entire snowman, so the first section had a little over half a pound!

Step Two:
Begin filling the second section to act as the ‘head’ of the snowman! You’ll want this to be a little smaller than the first section!
Be sure to have extra sock hanging over at the top after completely filling!

Step Three:
Use rubber band to secure the second section of the sock, leaving some extra sock hanging at the top!
Since we have stripes at the top of our sock, we’ll be flipping it over to use as a hat. If your sock is completely white, you’ll flip the excess over the entire second section and secure it with another rubber band!

Step Four:
As mentioned in step three, use the excess hanging sock and flip it over the second section. This will act as our snowman’s hat!
If you don’t have color or a pattern on this part of the sock, you can flip it completely over the second section, and secure it with a rubber band!

Step Five:
With your second colorful/patterned sock, cut the open side at about one inch. The scrap should still be in a circle, so make a final cut to turn it into a strand. This will act as your snowman’s scarf!
If you still need a hat for your snowman, be sure to cut the closed (toe) section of the sock! You’ll want it long enough to cover a little under half of the second section.

Step Six:
Use the scrap from your patterned/colorful sock and either glue or tie it between the two sections. If you made your own hat, secure it to the top of the snowman’s head. Now your snowman is nice and warm!
Next, use your fabric markers to draw on his/her eyes, smile, and carrot nose! Use your choice of colored marker for the “buttons”, or glue on your own buttons/sequins/etc.!

Voila!
You’re all done! Enjoy your cute and cozy pal all season long! Make friends for them to pose by, or just for you to look at!
We hope you enjoyed this super quick and easy DIY that’s perfect for you and your kids! We had tons of fun making these at our house and they’ll surely be coming back every holiday season from now on! Be sure to check out our blog weekly, for more DIYs, tips and tricks, and more!